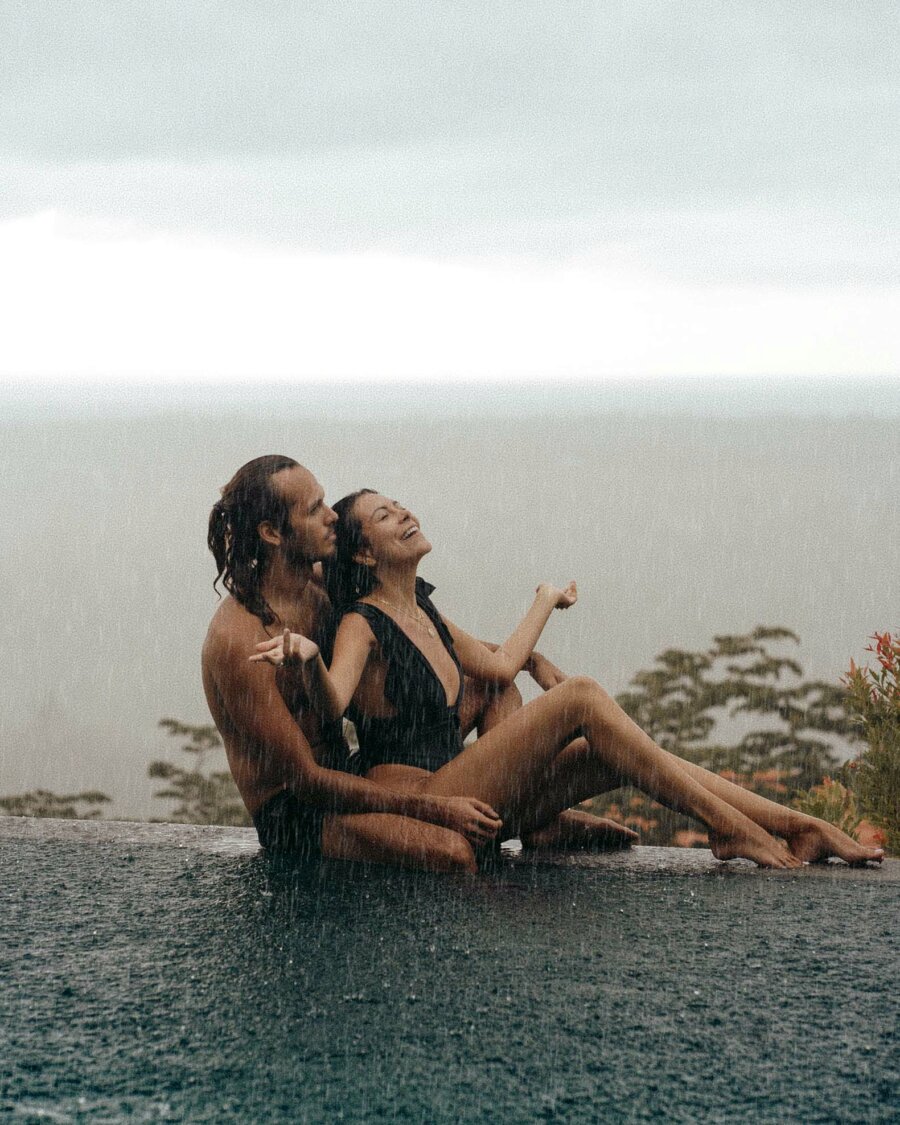
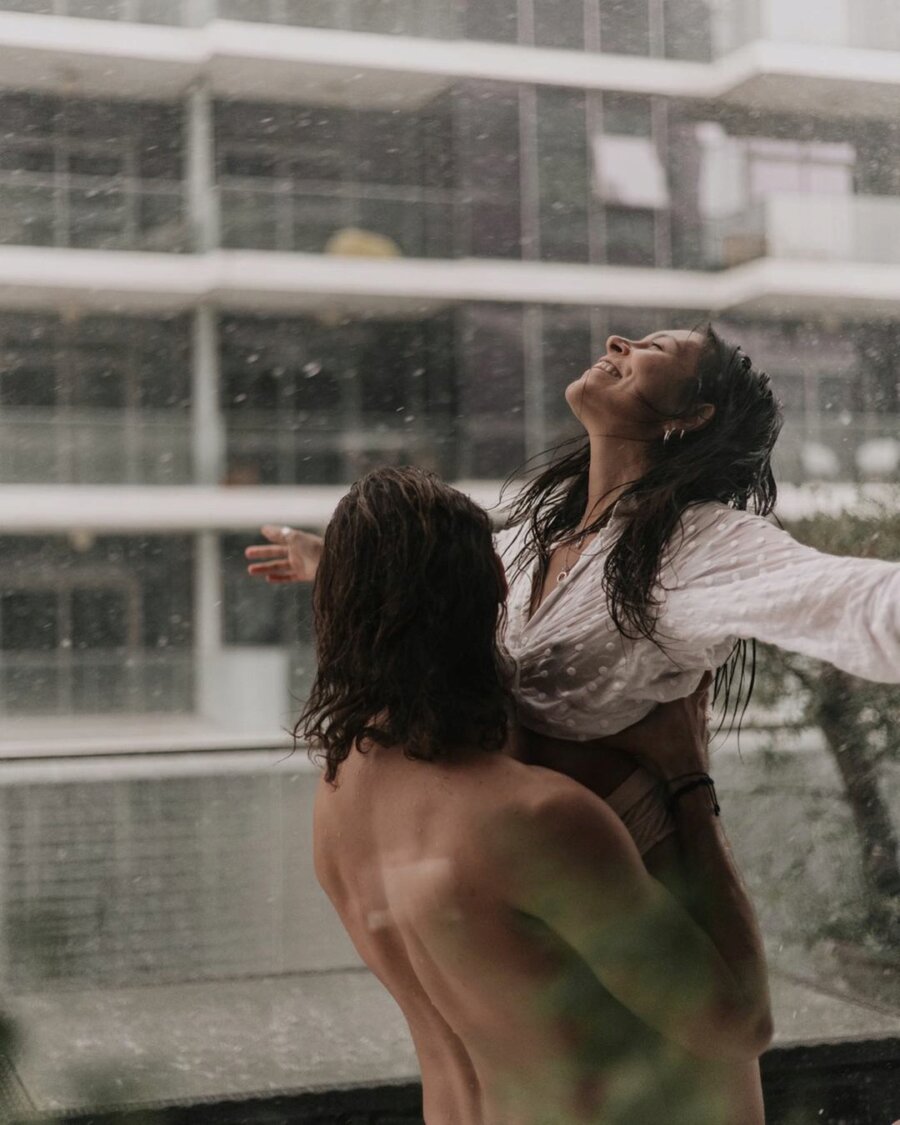
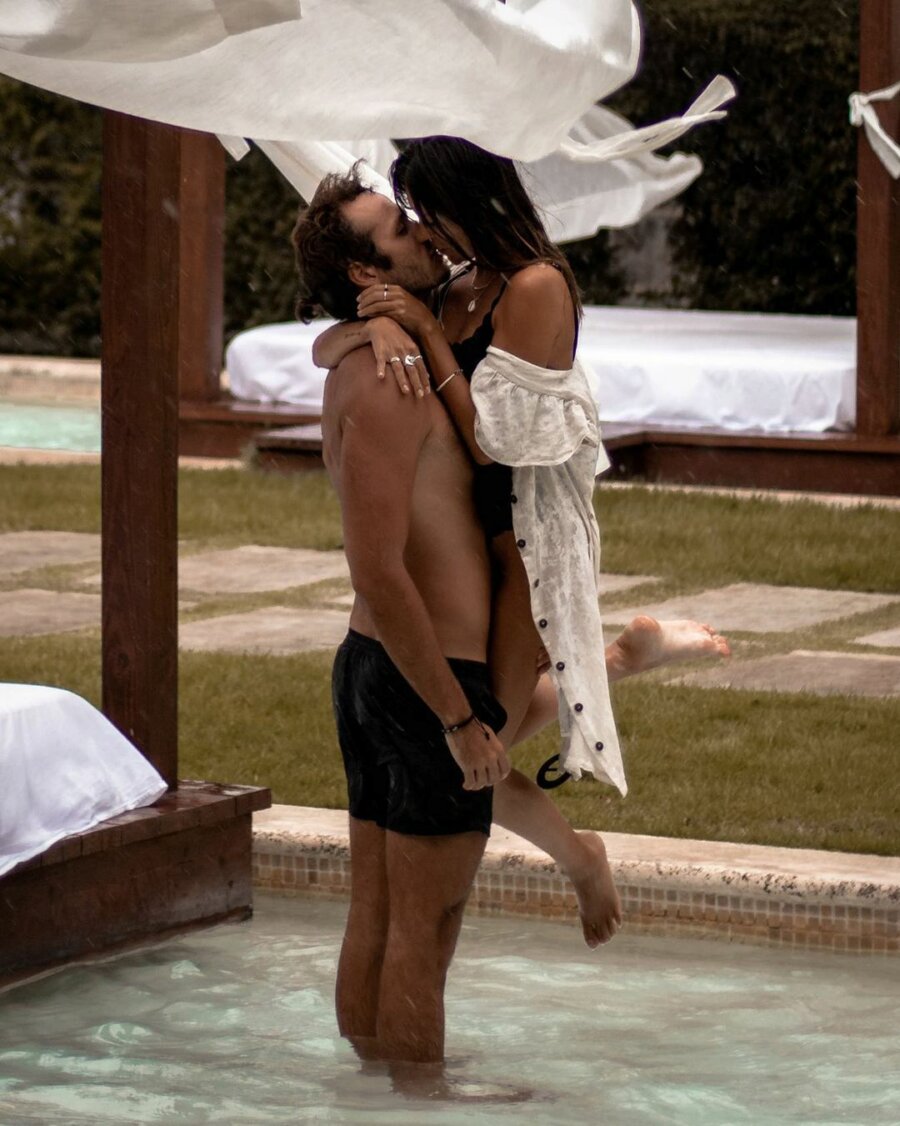
Rain after rain, our routine was always the same. We looked at each other, then looked out and tried to figure out whether or not we had the perfect rainfall to shoot. Our mission? We just wanted to capture a PS I Love You moment, you know the one...but we failed and failed, again and again. The result was always the same: A good picture but without visible drops of rain for that artistic and moody edge. We were stuck, not for the lack of trying, but simply because we couldn't get the settings right...at least that's what we thought. To be fair, we didn't get to try very often. We were living in Dubai back then an rain is not a frequent commodity - even with all the cloud seeding.
We felt stuck. Time after time (mostly during our holidays) we kept looking for the perfect rainfall to get it right and hoping to get better results, but even as the rains got stronger and the raindrops got bigger we kept having similar results. We realized then that we needed the help of Photoshop. Trust us when we tell you that this is an extreme for us. Our editing normally only involves color corrections and some object removals in Lightroom. It is only for rare creations that we are forced to edit our photos in Photoshop and we are honestly not very used to it.
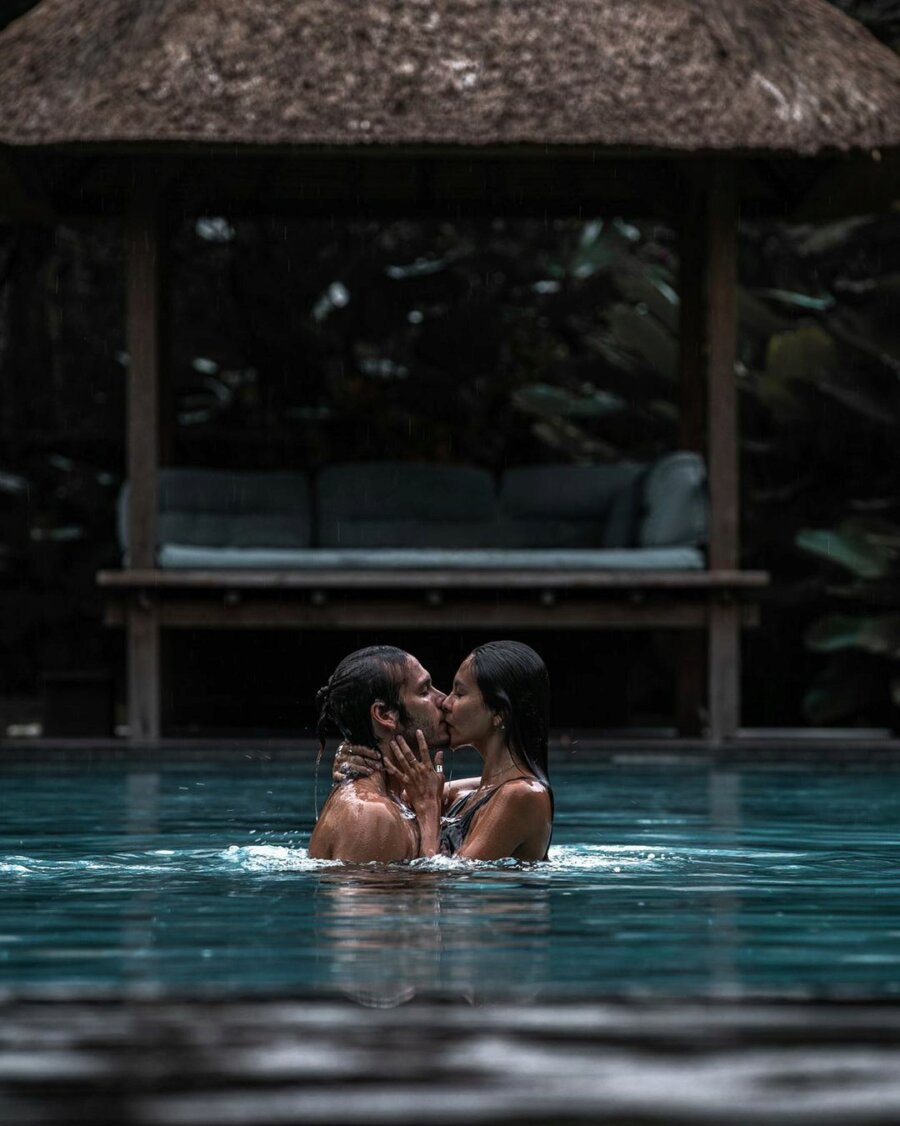
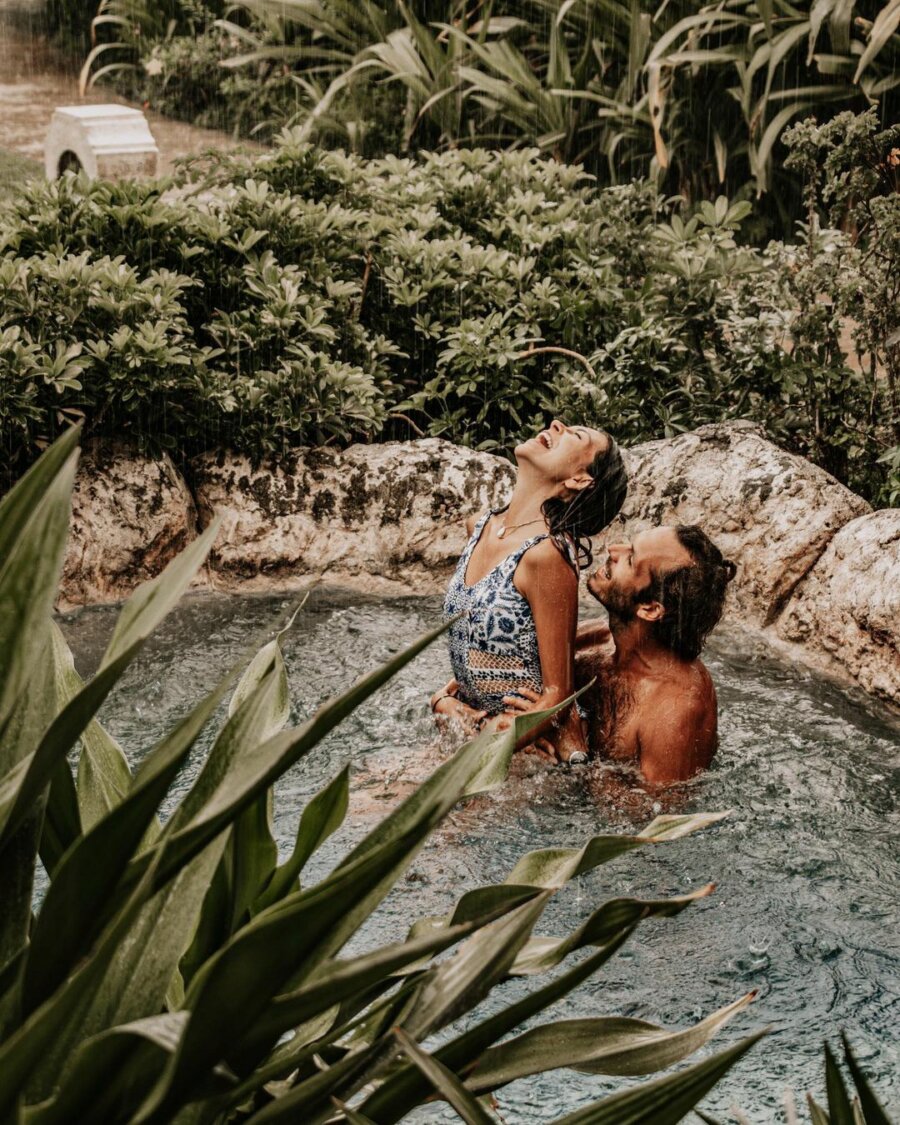
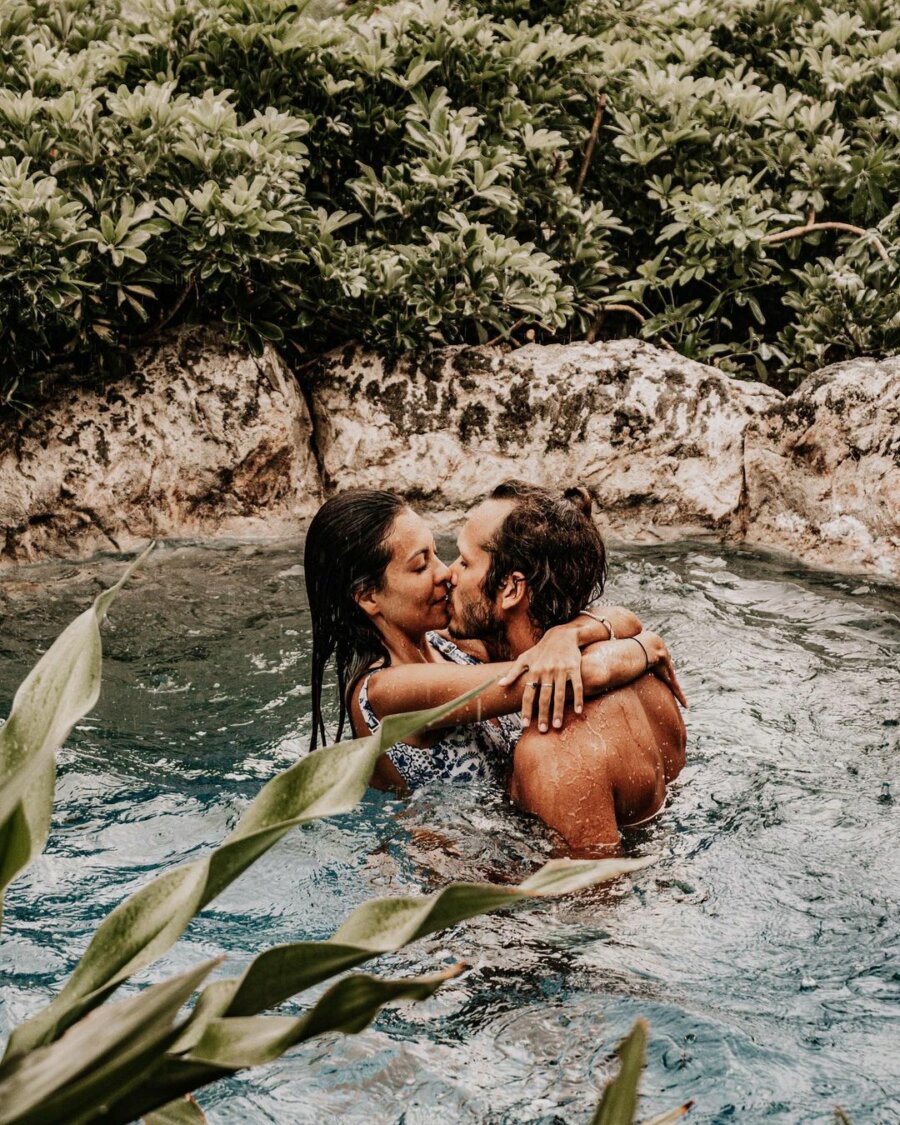
Below you can see one of our latest posts and one of our favorite shots. The “original” image refers to the image after some tweaking in Lightroom. On the left you can see the image after being edited in Photoshop to add some artificial raindrops. The photo was edited using the method described here and we were very happy with the result. We added took the liberty to add some steps to make the editing process easier. The process is really easy and you don’t need any previous experience with Photoshop to get good results.
We'll take you through some tips to get the shot right in the moment, so you can scroll all the way to the bottom if you already know how to shoot in these conditions.
 Original
 Modified
Most of our images are self-shot. We set up the tripod, choose the camera settings and set the focus. Then we put the camera on interval shooting mode and start doing our thing. I’d say we’ve gotten pretty good at it, and it works, but it also takes time...a lot. And getting it right when it's raining is not very easy.
Many times we started setting up the shot as soon as we saw heavy rain, but ended up missing the perfect window just because we needed too long to set everything up. Timing is definitely key and you should be ready for when the perfect rain appears - read below our recommendations on how to shoot in the rain.
Why Are Raindrops not Visible?
It’s not a nice feeling when your shot doesn’t turn out the way you envisioned it - we’ve all been there. Luckily there are a lot of options nowadays to edit the photos in post and give them an additional edge, but can you imagine shooting back when everything was analog?
Making the raindrops visible in the shot is really not an easy task...and of course the outcome and difficulty will depend on many factors. But know one thing: you need contrast between the tiny translucent drops and your background to make it work.
Sometimes you won’t have much choose, and you’ll have to work with what you have available. But keep in mind that bright backgrounds will hide the raindrops and you might not be able to fix it even in post editing. Look for darker surfaces or even the clouds if they are dark and use the light to make the drops brighter. This is were artificial light will help you get better results, but if you don’t have one just consider the following:
- Raindrops are really small, but not all rainfalls are the same. It's easier to shoot when the drops are larger.
- It's much easier to capture close-ups, because the larger size of the drops relative to frame
- White and bright surfaces (or background) will hide the raindrops. Look for darker surfaces.
- You can "fake the rain" in post, we'll show you how. But even fake drops won't be visible against brighter backgrounds
- Look for other object were the presence of rain is evident - keep an eye for splashes on surfaces, reflections on wet objects and even movement due to the action of wind.
How to shoot in the rain?
Taking pictures in the middle of a rain pour is really fun, at least it is for us. We love being playful in the rain whilst the camera is doing it’s thing - but you need to be able to tell the camera what it is that you want in the first place. Even more importantly, you need to be sure that your gear is protected from the rain since water and electronics are generally not a good mix. So before getting into the settings let us get into the type of gear that we recommend for this type of shots.
Must Have Gear for shooting under the rain:
As we get into an age where cellphone cameras and computational intelligence are catching up with professional cameras and manual exposure settings it gets harder to recommend a good DSLR or mirrorless camera over a cellphone, but we'll still risk it. There's still a great advantage in having pro/semi-professional or even pro-sumer cameras over an iPhone or a Samsung Galaxy, but as we mentioned, they are catching up...quickly.
You can read more about this topic here.
Why is the size of the sensor important?
This is a major topic and you'll find plenty of discussions online. To get to the point, larger sensors generally means a larger size of each individual pixel, which in turn means higher sensibility to light. Additionally, a larger sensor generally belongs to a more expensive camera so the quality of the sensor is also better. All of this means that larger sensors are capable of handling low light situations better, meaning that they generate less noise at higher ISO values and capture more light.
Long story short, a larger sensor generally means a better ability to handle low light. It is a bit more complex than that, but we can discuss that in a later post.
What other type of gear do I need?
Well that is much easier to answer than the previous question. Basically you'll need a raincoat for your camera (and perhaps for you) if it is going to be exposed to the rain. You might be able to get the shot that you want insight of a car, or protected inside a house or under a roof, especially if you have a good zoom lens - but we recommend a raincoat for your camera just in case. Don't risk your valuable camera just to save a couple of bucks in a rain-cover. Even if your camera (AND LENS) are weather proof you shouldn't risk it, we definitely wouldn't, not anymore.
We also recommend a good camera bag that protects against the rain just in case that you get caught in the rain getting somewhere to take the shot. This is coming from our own experience! Please think about the value of what you are taking with you, it is generally worth spending some bucks on a good bag instead of just risking it all to save some money. Yes, good camera bags seem expensive but they are the ultimate protection between your expensive gear and the elements. We came really close to loosing more than 10k USD because we didn't feel like investing on a "good" camera bag.
Just in case it's not obvious, we'd definitely recommend a tripod. You might have to reduce your shutter speeds to get the right exposures and this can induce some camera motion blur to your photos if you shoot handheld, especially with zoom! Cameras are getting better at this with features like lens and in-body image stabilization, but bringing a tripod is always a good idea.
Last but not least, you might want to carry some lights and/or an off camera flash to get interesting effects on the raindrops. We'll discuss this later.
A bit about exposure settings and the exposure triangle
Understanding the different camera settings, how they affect the image and how they interact with each other is crucial to get shot right - or at least to make sure that your camera is choosing the right settings for you.
If you want to understand about the settings and what they mean, I encourage you to head to YouTube. This post is just a short guide on how to get the settings right and don't intend to make it too technical. However, I'll give you a quick overview on aperture, shutter speed and ISO so you can choose the proper settings when the sky starts pouring rain.
Aperture:
This is the trendier of the three. It refers to the opening of the lens to allow light into the sensor. A larger aperture simply means that the lens opening is wider, thus allowing more light.
The aperture is measured with the f-stop number, which is actually inversely proportional to the actual area of the opening (a lower f-stop means a wider aperture, weird right?).
Changing the aperture will not only affect the quantity of light (per unit of time) that is allowed into the sensor, but will also influence the depth of field. Have you seen the photos with sharp subjects but blurry backgrounds? This is depth of field, or actually the lack of. Increasing the aperture (lowering the f-stop) will also decrease the depth of field, increasing the blur in the parts of the image that are not in focus.
Have you ever heard the term fast lens? Well, it basically refers to a camera lens capable of reaching very low f-stop numbers (very wide apertures). These are generally more expensive, larger and even heavier than similar lenses with the same focus lengths but higher f-stops. Fast lenses allow more light, which makes them suitable for low light situations. They are also capable of generating very shallow depths of field.
Shutter Speed:
This one is easier to explain, promise. The shutter is the part of the camera that opens and closes when you take a photo. When you press the shutter, the camera sensor is left open for x amount of time until the shutter closes.
The number that you see in the shutter settings is the time of capture in seconds (or actually the inverse of). A shutter setting of 60 means that the sensor is able to capture the scene for 1/60s. This inverse relationship is the reason why we actually talk about shutter speed (it is more intuitive since larger numbers mean more speed, instead of less time). Hence, the shutter speed is a critical value to determine the exposure. Larger capture times (slower shutter speeds) allow more light into your image.
With a large shutter speed you'll able to "freeze" motion, because the sensor is only exposed for a couple of milliseconds. Slowing the shutter will induce motion blur in your image.
ISO:
This is the last one of the settings, and is the one you should avoid modifying. ISO refers to the amplification or "gain" to the digital signal coming from the sensor. Camera sensors are made of pixels that are receptive to light. When the shutter is opened, photons start reaching sensor. The energy coming from each photon is transmitted by the pixels as an electrical signal to the processor of the camera that receives and interprets this signal.
Increasing the ISO simply means that this signal gets amplified or, in other words, that the sensor becomes more sensible to light. Hence, increasing the ISO also increases the exposure.
Unfortunately, amplifying the signal also means that noise also gets amplified which is why we start seeing it in our images with larger ISOs until the image becomes indistinguishable.
The Exposure Triangle
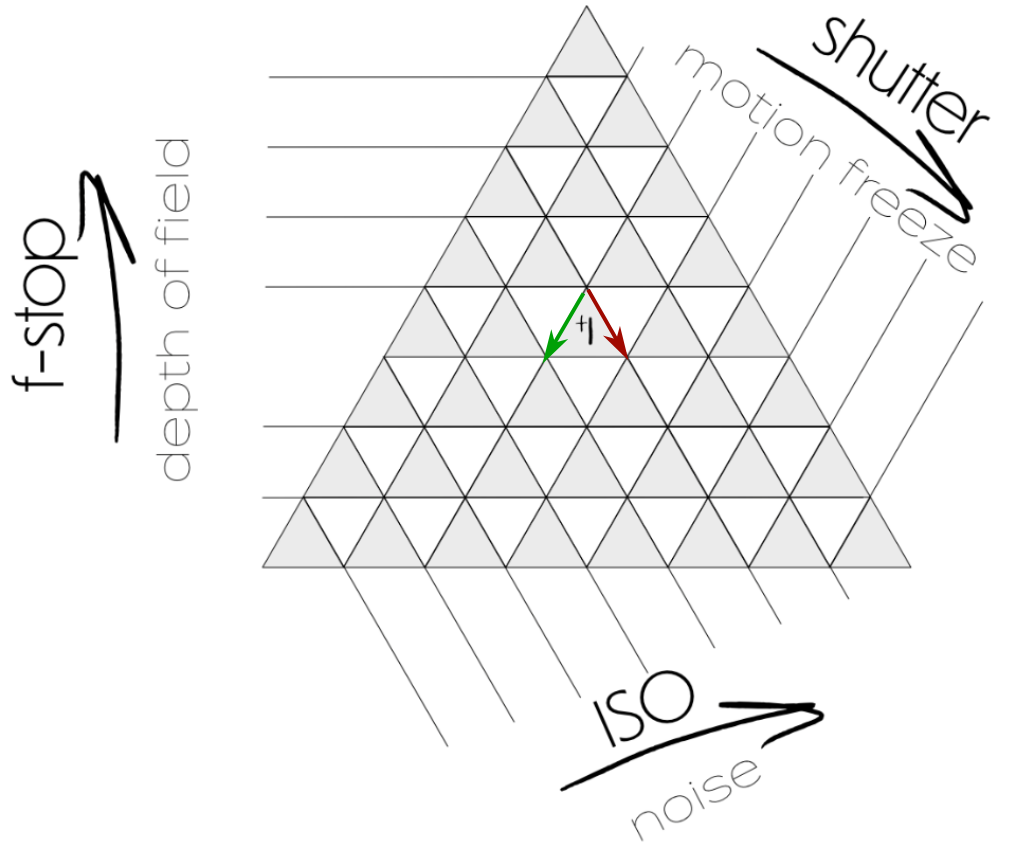
Ok now that we know the three different camera settings affecting the exposure (aperture, shutter speed and ISO) and how each of them affects the composition (depth of field, motion blur, image noise) we can understand the exposure triangle right? Well, not really. To be very honest I don’t think much people actually know how to read it. My guess is that it has become kind of a standard when it comes to describing exposure settings that people simply just use it without putting much thought into it.
The truth is that I don’t really know what to make of this triangle, specifically how to read it or use it. In fact I spent some time looking for an answer and even though I found tons of variations of the famous triangle I really haven’t found a single source explaining how it is supposed to be used. So I just tried to implement my knowledge and this is how I read it.
Let’s start with my version of the exposure triangle. Note that it the three settings on a different “axis” (hence the triangle). Each one of the setting has divisions, which are referred to as steps - this is an actual term used in photography. Changing one of these settings by one step will also change the exposure by one step, so decreasing the f-stop by one step will allow more light into the sensor and the exposure will be increased by one step - assuming that the other two settings remain unchanged. So far so good.
Now let’s assume that we have a perfectly exposed image (this is referred to as an exposure of 0), but we want to lower the f-stop by one step to reduce the depth of filed (this happens when want to separate the subject by creating blur in the background). If we leave the other settings unchanged the exposure would be increased by one step, so we need to compensate this by changing at least one other setting. Looking at the triangle we could either follow the red line (same ISO, but increasing the shutter speed by one step) or the green line (same shutter speed, but reducing the ISO by one step).
Basically, in my interpretation, the exposure triangle shows you the different paths to keep the exposure setting when one of the settings is changed. Does it make sense?
Tips to shoot in the rain
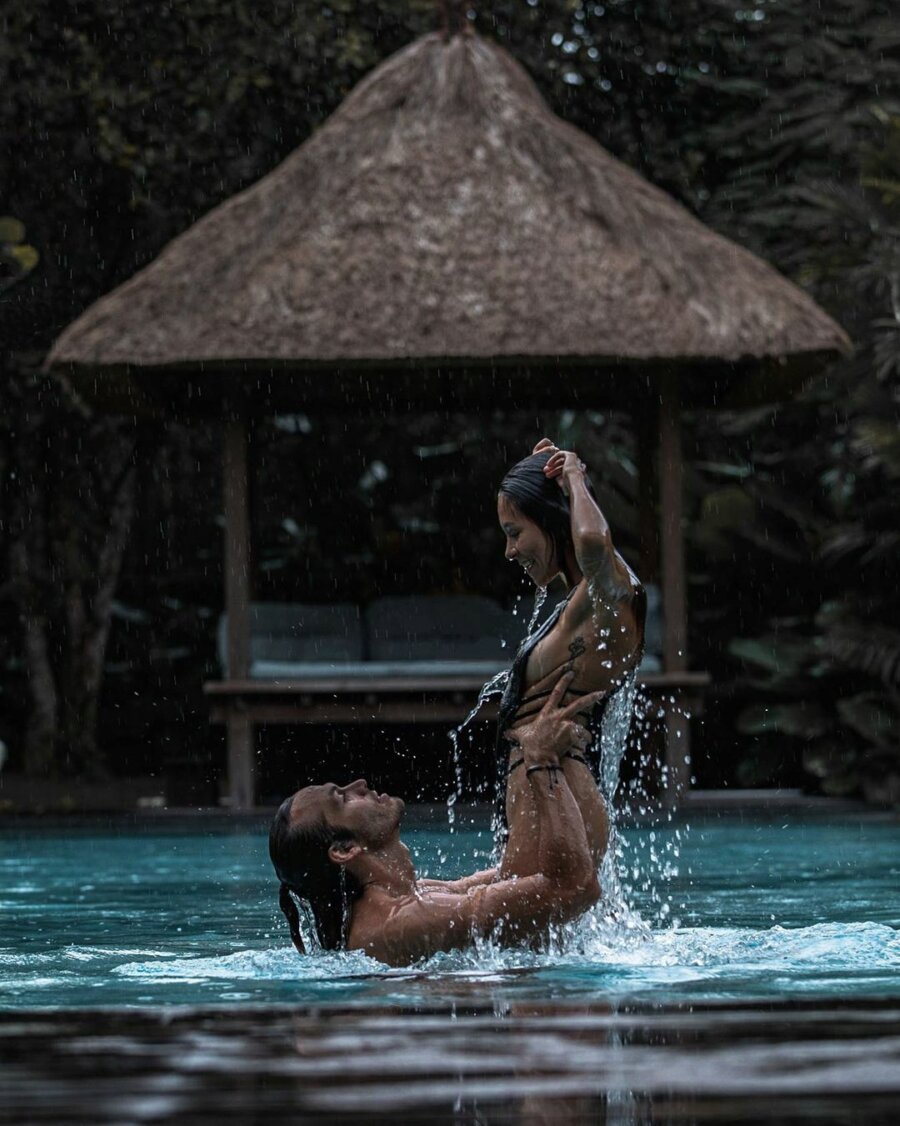
Shooting under the rain generally means gray skies and low light, so you might need to make some compromises in the exposure settings depending on the type of shot that you want ( slow shutter, wide apertures or high ISO values). Remember that the raindrops are an extra object that you have to consider for your composition. Slow shutter speeds will induce motion blur in the drops, making them appear as lines instead of single drops. Think about the subjects/objects and determine how fast they will be moving. If it's only us in the frame we normally get away with a shutter speed of 1/60 understanding that we have to make slow movements. This also creates some motion blur in the raindrops that ads a dramatic look to the image at the expense of loosing some detail in the splashes on the surface of the pool. For this particular shot, ISO was set to 320 which is very good for this particular full frame camera.
Most of the time we will think about the max. ISO that our camera can handle and derive the other two settings from there to create the artistic look that we desire. Full frame cameras can handle high ISOs up to 3200 or above, but APS-C and particularly smaller cameras with sensor sizes below 1" will struggle with ISO values higher than 800.
The next limitation to your exposure triangle and your composition will be the aperture - what type of lens are you shooting with? Phone cameras have often fixed apertures at 2.8, whereas some kit lenses in full frame cameras have max. apertures of 4.0. We always recommend canon's nifty fifty (the EF 50mm f1.8), because it's a great lens and really affordable. Thanks to adapters you'll also be able to use this lens in other mounts.
So knowing all of this, how can I get a good moody photo under the rain? Here are some tips and ideas for you to try:
- Don’t get distracted by the rain: Photography is a skill and an art, but the key in every photo is the composition. All elements in the shot are important, even the ones that are not in the shot. Look for splashes, reflections on wet surfaces or even mist and fog. How moody is the sky? Will it add value to my shot?
- Use lights for your composition: Raindrops will definitely pop if backlit. In street photography you can use lights coming from cars and buildings, but also traffic lights. But you can also use you own lights.
- Think twice about the aperture: Remember that rain is now a subject in your photo, do you want depth of field in your raindrops or not? What about bokeh? Do I have background lights to create interesting looks to my image?
- Nail the shutter: How much motion blur do you want in the raindrops? Remember that they are falling fast and you need fast shutter speed to actually “freeze” them. But it’s not black and yellow, how much blur do you actually want?
- It’s all about contrast: Remember that you need contrast of luminance to make your raindrops visible. Raindrops agains light surfaces will not show...even if we add them later they will not show.
- Have fun: Rainshots is all about, well, rain. Don’t be afraid to get soaking wet - if you’re in the shot you actually have to.